Picture this: You open your fridge, looking for something to eat—and instead, you’re greeted by wilted greens, mystery containers, and leftovers you meant to use days ago. Sound familiar?
It’s honestly frustrating how easy it is for good food to go bad just because things get buried or forgotten. The money wasted, the plans ruined, and (let’s be real) that sinking guilt every time you toss something out add up quickly. Nobody wants their grocery budget turned into compost.
By the end of this fridge organization guide reduce waste, you’ll have the know-how and everyday tweaks you need to actually keep food fresh longer, see what you have at a glance, and finally take control of your fridge. Ready for a fridge that works with you—not against you?
Why Food Gets Wasted: Uncovering Common Refrigerator Traps
Ever wonder why produce wilts, leftovers turn questionable, or expensive cheese gets buried in the back? You’re not alone—most people battle food waste because of sneaky refrigerator traps hiding in plain sight.
Here’s the thing: the modern fridge wasn’t actually designed with food waste prevention as the top priority. Instead, it’s an appliance that loves to create blind spots—both literally and figuratively. According to the Natural Resources Defense Council, American households throw away up to 25% of the food they buy, much of it due to poor fridge organization and placement mistakes.
💡 Pro Tip: Keep ready-to-eat items at eye level. Studies show that foods placed in your direct line of sight are used up to 50% faster than those hidden on low or back shelves.
Picture this scenario: you’re meal-prepping on Sunday, confident your spinach will make it to Friday’s omelet—except by Thursday, it’s transformed into mush, lost at the bottom behind takeout boxes and jars you forgot you owned. It’s not your fault; fridge design, packing routines, and deceptive cooling zones work against you.
- Temperature Zones: The top shelf is usually warmer than the bottom, so placing dairy or leftovers there speeds spoilage. Thin-skinned fruits wilt in overly cold crisper bins meant for veggies.
- Opaque Packaging: Non-transparent containers—like foil-wrapped plates or branded tubs—hide what’s inside, easily slipping from mind.
- Overstuffing: When your fridge is too full, air circulation drops and cold spots develop, making it almost impossible to see (or use) what’s actually edible.
- Expiration Blindness: Without any visual cue system, older food gradually moves back unnoticed. You see only what’s upfront—until you discover a science experiment during spring cleaning.
| Trap | Result | Solution |
|---|---|---|
| Poor Airflow | Uneven cooling; spots too warm or cold | Don’t overload shelves; space items |
| Opaque Packaging | Foods forgotten, wasted | Transfer to glass or clear bins |
| Lack of Labels | No idea when items expire | Date everything as you store it |
And honestly? It’s these small structural traps—not major cleaning fails—that drain your grocery budget over time. What actually works might surprise you…
Setting Up Your Fridge Zones For Maximum Freshness
What’s the real secret to keeping food fresher, longer? It’s not just about what you buy—it’s where and how you store it inside your fridge. Proper zoning transforms your refrigerator from a jumble of mystery leftovers into a high-efficiency freshness machine.
- Clear Out and Clean: Start by emptying the fridge completely. Wipe down all shelves and bins with warm, soapy water. Why? A clean slate helps you see—and smell—what’s actually happening in there.
- Know Your Zones: The top shelf is best for ready-to-eat foods like yogurt, deli meats, and leftovers because it’s slightly warmer. The middle keeps dairy and eggs stable. The bottom (coldest zone) is perfect for raw meat, poultry, and seafood—just use a tray to catch leaks.
- Assign Produce Drawers: Use the low-humidity drawer for apples, grapes, and leafy greens. The high-humidity drawer works for carrots, broccoli, and peas. Sound fussy? Even the USDA points to humidity control as a major reason why vegetables last longer.
- Group By Use and Frequency: Keep milk and juices near the back (coldest), condiments on the door (they’re less perishable), and snacks front and center for quick grabs.
- Label and Date: Add dates to leftovers or anything you repackage. That way, you’ll always know what to use first—no sniff test required.
- What You’ll Need:
- Clear storage bins (preferably BPA-free)
- Trays or mats for meat and seafood
- Adhesive labels or grease pencils
- Natural deodorizers (like baking soda or charcoal packets)
💡 Pro Tip: Keep a fridge thermometer on the middle shelf. According to the Food and Drug Administration, the optimal temperature to prevent spoilage is 37–40°F (3–4°C).
In practice: Imagine your workweek starts with produce stacked where you can see it—strawberries in a clear bin on the top shelf, greens crisp in the humidity drawer below. Dinner plans change? No stress; everything’s visible in its zone, ready when you are.
| Zone | Ideal Foods | Pro Safety Tip |
|---|---|---|
| Top Shelf | Leftovers, dairy, deli items | Consume within 3–4 days |
| Middle Shelf | Eggs, milk, cheese | Store milk at the back |
| Bottom Shelf | Raw meat, fish | Use a leakproof tray |
| Drawers | Produce | Separate by humidity needs |
| Door | Condiments, juices | Not for dairy or eggs |
And this is exactly where most people make the most common mistake—misplacing sensitive foods just because that’s what ‘fits.’ Ready for the top storage tips that extend shelf life? You’re about to level up your kitchen game…
Game-Changing Storage Tips To Extend Shelf Life
Which storage hacks actually keep food fresher—not just for a day, but for a whole extra week? Let’s ditch the “best if used by” guesswork and get strategic with science-backed storage tips you can use, starting right now.
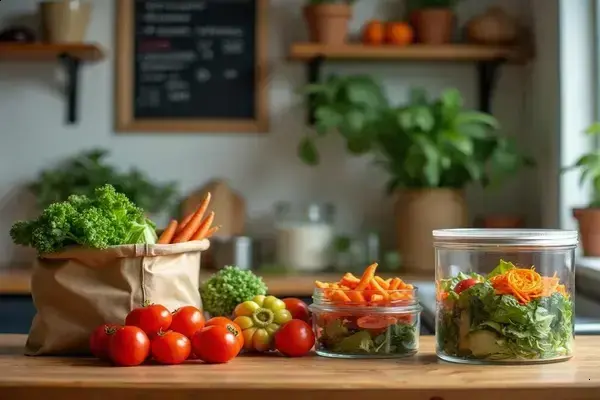
- Use Airtight and See-Through Containers: Transfer leftovers, sliced veggies, and cheeses into airtight glass or BPA-free plastic containers. When you see it, you’ll eat it—no more forgotten surprises.
- Line Drawers and Shelves With Paper Towels: Absorb excess moisture from produce and herbs by lining bins and drawers. You’ll slow down the wilting and keep greens perky. Swap towels weekly for best results.
- Invest in Produce-Saver Containers: Specialized bins (like OXO GreenSaver or Rubbermaid FreshWorks) use ventilation and carbon filters to extend shelf life, especially for berries and lettuce. Consumer Reports highlights their effectiveness in comparative testing.
- Store Herbs Like Flowers: For parsley, cilantro, and mint, snip the ends and place stems in a glass of water, loosely covered with a bag. Store in the fridge and change water every couple days.
- Vacuum-Seal When Possible: If you regularly stock up on meats or cheese, consider a vacuum-sealer. Removing air dramatically slows spoilage and works wonders for batch cooking or freezer storage. The USDA notes vacuum sealing is especially beneficial for protecting protein-rich foods from freezer burn.
💡 Pro Tip: Bananas, apples, and avocados emit ethylene gas, which can make nearby produce ripen (and rot) faster. Always store them away from leafy greens or berries to maximize shelf life.
Picture this scenario: you spent Sunday afternoon meal-prepping, stacking clear containers of grilled chicken, chopped fruit, and hummus. By Thursday, instead of tossing soggy spinach or slimy strawberries, you’re pleasantly surprised—everything looks & tastes just as fresh as Monday, thanks to those airtight containers and strategic produce bins.
- Bonus Tips:
- Keep dairy and eggs in original packaging for proper protection.
- Don’t wash berries until just before eating; excess moisture speeds spoilage.
- Rotate foods forward as you add new groceries so older items get used first (“first in, first out” method used by professionals).
| Storage Tool | Best For | Shelf Life Impact |
|---|---|---|
| Glass Containers | Leftovers, produce, cheese | Reduces spoilage by up to 50% |
| Paper Towels | Greens, herbs | Keeps produce dry & crisper |
| Vacuum Sealer | Meat, cheese, bulk items | Triples freezer shelf life |
But there’s one detail most home cooks completely overlook until it’s too late: how—and when—to decide what stays and what goes next…
What To Toss And When: Decoding Expiry Dates With Confidence
Ever stared at a yogurt cup wondering if “best by” actually means it’s trash today—or still good for a smoothie tomorrow? You’re definitely not alone. Fridge expiry dates confuse everyone, and the real risk is either wasting perfectly edible food or, worse, eating something that could make you sick.
Manufacturers use several types of dates: “Best by” means best flavor, not safety; “Use by” is the last day for peak quality, and “Sell by” guides the store, not you. Only on infant formula does the date signal absolute safety, according to the USDA Food Safety and Inspection Service—not on most everyday groceries.
- Look, Smell, and Touch: Many foods stay fresh days (or weeks!) beyond date labels. Trust your senses—but always err on the side of caution with proteins or anything that smells ‘off.’
- Keep a Rotation System: Store newer items behind older ones. Bring forward those you need to use soon. This classic “first in, first out” method (widely used in restaurants) helps cut waste fast.
- Know the Signs: Slimy texture, mold spots, sour or pungent smells, and bulging lids on jars—these are red flags for spoilage.
| Item | Typical Fridge Life | What to Watch For |
|---|---|---|
| Cooked Meat | 3–4 days | Change in color or smell |
| Dairy (milk/yogurt) | 1 week past date | Curdling, sour aroma |
| Fresh Produce | Up to 1 week | Wilting, mold, mushiness |
| Leftovers | 3–4 days | Bitterness, visible mold |
⚠️ Important Warning: If in doubt—especially with meat, eggs, or seafood—don’t risk it. Foodborne illness isn’t worth a few saved dollars. If you’re managing dietary needs or have a health condition, always check with a licensed nutritionist or your healthcare provider.
In practice: Imagine you’re organizing your fridge on Sunday. You spot a tub of hummus two days past its “best by” date. It looks and smells fine, so you move it to the front—and use it for tomorrow’s lunch. That’s the sweet spot between safety and reducing unnecessary food waste.
- Quick Reference:
- Freeze items before they reach their limit if you can’t finish them in time.
- Write the date you opened items on the packaging to track freshness.
- Keep a simple “toss list” stuck to the fridge—periodically review so nothing lingers unnoticed.
And this is exactly where most people make the most common mistake—not checking dates regularly or understanding label meaning. But a smart weekly system changes everything…
Your Weekly Fridge Check: Simple Routines That Actually Work
What if you could cut food waste just by investing five minutes each week in your fridge? You don’t need fancy tech or hours of your weekend—just a rock-solid routine built on what works for real households. Here’s how to make your fridge check second nature.
- Empty and Scan: Pull out everything (yes, even the ketchup), and do a rapid assessment. Check for leaks, wilted veggies, and mystery leftovers hiding in the back.
- Wipe and Refresh: Use a damp cloth to quickly wipe down shelves and drawers. Swap out any liners or paper towels trapping moisture, ensuring you’re not making a cozy home for mold.
- Group and Rotate: Bring items closest to their use-by dates front and center. Place new groceries behind older ones. This FIFO approach—”first in, first out”—is also used by professional kitchens and grocers worldwide, noted by the Food Marketing Institute.
- Restock Zones: Double-check that foods are still living in their ideal zones: proteins at the bottom, snacks at eye level, produce crisp and separated by humidity needs. You’ll spot issues before they become a stinky surprise.
- Write and Update: Jot down a quick “eat this soon” list, stick it on the fridge door, and update with each check. It’s a low-effort way to keep everyone in the house on the same page.
💡 Pro Tip: Set a recurring phone reminder for the same day each week—make it just before your regular grocery trip so you shop smarter and never double-buy what you already have.
In practice: every Sunday after breakfast, you spend three minutes scanning containers, rotating milk jugs, and tossing what’s past its prime. By lunch, you’ve already decided what to use first. Less guilt, fewer science experiments.
- Essentials for Your Routine:
- Reusable cleaning cloths
- BPA-free containers and clear bins
- Grease pencil or dry erase marker for labeling
- Sticky notes for your “use first” list
| Routine Action | Time Needed | Benefit |
|---|---|---|
| Quick scan and toss | 2–3 min | Reduces waste instantly |
| Wipe surfaces | 1–2 min | Keeps fridge smelling fresh |
| Label and rotate | 2 min | Always use oldest food first |
The right habits in place now make everything easier from here. Simple, sustainable, and totally doable for every household.
Your Fridge, Finally Under Control
If you take just one thing from this fridge organization guide reduce waste, let it be: small, steady changes—clear zones, smart storage, and weekly checks—cut waste and make eating at home way easier. Grouping by freshness, using see-through containers, and knowing when to toss versus keep are your shortcuts to a fridge that works with you, not against you.
Before, your fridge probably felt chaotic and wasteful—leftovers lost, veggies wilting, money disappearing. Now, you know what goes where, how to extend shelf life, and how to confidently decode those confusing expiry dates. It’s a difference you can see, smell, and taste. Who knew making your fridge work smarter could be this simple?
Which one of these fridge habits do you think will help your household most this week? Share your answer in the comments—we genuinely want to hear your story!

Lauren Marie Collins is a meal planning enthusiast and nutrition writer dedicated to helping everyday people eat healthier, spend less, and actually enjoy the food they prepare. With a passion for practical meal prep systems and honest nutrition guidance, Lauren built this blog to make healthy eating feel simple, sustainable, and genuinely accessible for everyone.